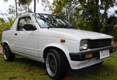
Still running the MB tank but if you look back through the stuff you will see that I grafted the SF swift electric pump into the tank.
There was a heap of crap in the tank, having it empty during the Townsville wet season when I did was obviously a bad idea. I have cleaned it out and will check the carby tomorrow morning and then we should be good to go.
Cheers
Paul
Now the MB Build thread
Ok the Mighty Boy held together on the dyno. The run was nice and smooth and consistent. Before I went down I pulled the secondary jet and opened it up from a 132 to a 140. Just as well I did as you can see that the engine is still running pretty lean in the top end so the cam and extractors are doing their job. I should have taken the jet drills with me to adjust while I was there but I didn't think of it. It will be fine as a baseline anyway for when we fit the injection up. Not quite the 30kw I expected but pretty close.
Brayden, it looks like my phone app was a little optimistic regarding the power output so you were right
Big thing now is to get the rest of the stuff done and the injection fitted. and go from there.
Cheers
Paul
Brayden, it looks like my phone app was a little optimistic regarding the power output so you were right
Big thing now is to get the rest of the stuff done and the injection fitted. and go from there.
Cheers
Paul
- Attachments
-
Well I couldn't find the slight water leak so the engine has come out today so that I can fix that one up. Also I am going to test fit the adapter plate for the ITB's while I have the engine out to see how that is going. Looking at the bolt locations I am probably going to have to pull the engine again to be able to get the manifold off when I fit then up properly but you get that on the big jobs. I will put a bung on the exhaust for the wide band as well. I am tempted to pop the head off while the engine is out and give the ports a tidy up and take a couple of thou of to up the compression a bit as well. The guys in the US reckon that lifting it to 10.5:1 wakes them up a bit. Other than that I am just waiting for the 36-1 trigger wheel to turn up so that I can start wiring in the ECU. I will probably just set it up as ignition only to start with to make sure I have got the triggering working that way that I want it and the ignition sorted. That way I am only dealing with one issue at a time. Best part about the Adaptronic is that it has a auto tune function for both fuel and ignition so once I get the base map in it, I just drive it around and it will do the rest.
Cheers
Paul
Cheers
Paul
Ok little update, the water leak has been fixed. $3.80 for a new water pump gasket. The ITB adapter is good to go as well everything lines up quite well. I will just have to blend the ports a little when I put it on properly but I will not worry about that at the moment. The only other thing that I have to do is sort out how I am going to mount the air filters so that they look nice and neat.
I decided to pull the subframe out while I was on the go to hit it with the high pressure water cleaner and tidy up a couple of the welds that I have done to give me the clearance that I needed around the place. Was easier than I thought but I guess we will see when it comes to putting it all back in.
Cheers
Paul
- Attachments
-
-
-
Ok so the engine is happy, all leaks are fixed and the sub frame has been tidied up. Time to get started on the EFI. Before I pull the ECU of the sprinter though I wanted to make sure that I had the thing running as it hasn't started in over a year.
There is a long story attached that involves the nashing of teeth and threatening to set the car on fire but I finally got it started with a spare fuel pump and jerry can of fresh fuel.
Turn out that it probably had an empty tank for just as long as the MB so it is likely that there will be a heap of crud in the tank because when I hooked the pump and stuff back up to the main tank it was doing the same thing. I am happy that it runs now though so it is time to start on the EFI for the MB.
I will machine up the 36-1 trigger wheel this week for mounting and look at how I am going to fit up the hall effect sensor. Once that is all in I will get it running ignition only and get it to self tune before I do the ITB's that way I am only takling one part of the problem at a time.
I am also going to pull the head for a tidy up when I do the ITB's as it will make them easier to fit. I am playing with the idea of setting it up to run on E85 but I am waiting on feedback on how much compression I will need to make it worth while and if that is acheiveable.
Cheers
Paul
No more work done at this stage on the EFI but the 14mm rear sway bar is all mounted up and ready to go. Just took it for a quick spin and it is heaps better. The under steer that was there is completely gone, tucks in nicely now and just zips around the corner happy as you like. I am still thinking about cranking the sway bar forward about 20mm to see if the extra caster helps some more but very happy with the way that it handles at the moment. Might need some new shocks in the back now though as it is getting a little bouncy.
Will try and take it for a run at the hill climb in October if I don't have the sprinter ready.
Cheers
Paul
Will try and take it for a run at the hill climb in October if I don't have the sprinter ready.
Cheers
Paul
do you have any pics of how you attached the rear swaybar? and what car its from?
http://www.calaisturbo.com.au/showthread.php?t=180305
It was too dark last night to take the photos but I will get some over the weekend and pop them up. The sway bar is from a Toyota Sprinter (it was the old one I had lying around from my race car) I just made up some mounts to weld to the rear beam and welded the mounts to the rear chassis rails. In hind sight there are a couple of things that I would do differently as there is a little bit of preload on the bar due to a slight misalignment that has increased the rear stiffness but it has worked pretty well given that it was done with bits that I had lying around.
Cheers
Paul
Cheers
Paul
ahh good stuff. im really keen to fit one to mine and upgrade the front and im doing a full suspension makeover shortly
http://www.calaisturbo.com.au/showthread.php?t=180305
Well to do it the same as mine you will need the following:
14mm rear sway bar from a Toyota Sprinter (other early model corolla may work but I don't know)
The two D bracket and bushes to hold it onto the rear axle
The two drop links that go between the bar and the chassis bracket
The two chassis brackets.
In addition to that you will need a 100mm long bit of 50mm box to cut in half to make the axle mounting points
and 2 x 100mm lengths of 15mm box to extend the drop links.
The photos should clear the rest up but it only took me about 2hrs total to fab and fit.
Cheers
Paul